
How to assemble a Kulik System chair
- Unbox and Verify Parts: Check for the back, headrest, wheels, gas lift, seat, and base.
- Assemble Seat Structure: Connect the backrest and headrest to the seat.
- Base Preparation: Fix wheels to the base and insert the gas lift.
- Final Assembly: Mount the seat onto the base.
Make sure all components are firmly attached before using the chair.

Correct adjustment of the Kulik System chair
- Armrest and Backrest Adjustment: Set armrests to one of 5 heights and backrest to one of 12 heights for personalized spinal support.
- Seat Customization: Adjust seat depth among 5 settings and chair height for proper leg positioning and comfort.
- Recline Features: Modify backrest angle for optimal recline and choose between 2 tilt inclinations for dynamic or stationary seating.
- Headrest Comfort: Alter headrest height, angle, and position for comprehensive neck and head support.

How to assemble a Kulik System chair SPACE
- Component Inventory: Verify all parts are included: headrest, backrest, base (cross), seat, mechanism, gaslift, wheels, and screws.
- Mechanism and Backrest Setup: Attach the mechanism to the seat and loosely affix the backrest with screws.
- Screw Tightening: Once aligned, tighten all screws on the mechanism and backrest securely.
- Base Assembly: Insert wheels into the base and place the gaslift after removing its plug.
- Chair and Base Union: Lower the seat onto the gaslift and base.
- Headrest Installation: Replace the placeholder screws with the headrest and tighten to finalize the assembly.

Correct adjustment of the Kulik System SPACE
- Seat and Backrest Adjustment: Match seat depth for leg comfort and set the backrest height in one of 7 positions for lumbar support.
- Headrest and Armrest Alignment: Position the headrest among 7 levels and adjust armrests for neck and elbow relief.
- Support and Recline Customization: Choose from 16 back support angles and adjust recline tension for personalized comfort.
- Backrest Fixation: Recline and then lock the backrest at your preferred angle for stable support.
How to assemble an E-Table Universal
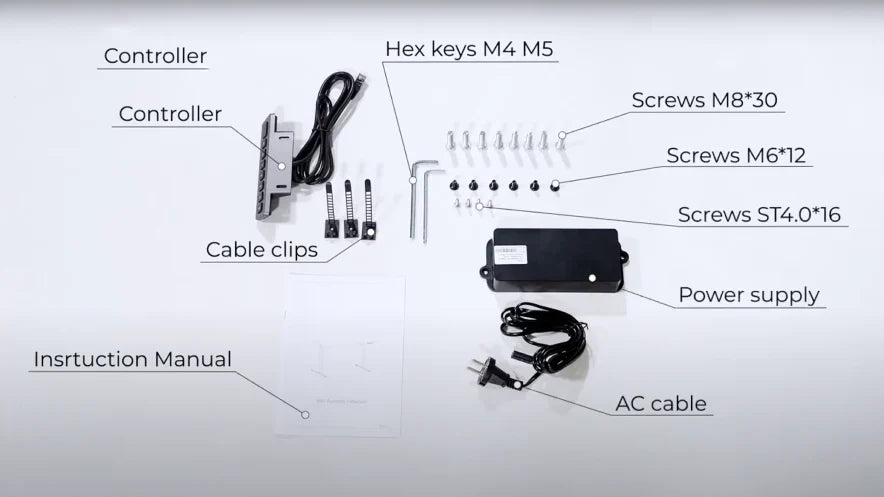
Component Inventory: Verify all parts are included: Controller, cable clips, manual, hex keys (M4, M5), screws (M830, M612, ST4.0*16), power supply, AC cable.
Assembly:
- Assemble legs to frame with M6*12 screws; tighten with M4 hex key.
- Attach feet with M8*30 screws; secure with M5 hex key.
- Install controller with ST4.0*16 screws; tighten with M4 hex key.
- Mount power supply with ST4.0*16 screws; fasten with M4 hex key.
Check all connections before use.
Correct adjustment of the E-Table Universal
Smart tables, are gaining popularity in today's workplace and homes for several compelling reasons:
- Health and Ergonomics: They encourage alternating between sitting and standing, reducing the risk of back pain and other posture-related issues.
- Productivity Enhancement: With adjustable height features, they cater to the comfort of the user, which can lead to increased productivity.
- Convenience and Technology Integration: Built-in connectors for power, data, and USB streamline the work area and reduce clutter.
- Modern Design: An aesthetically pleasing design complements the modern workspace, appealing to employees, freelancers, and gamers alike.

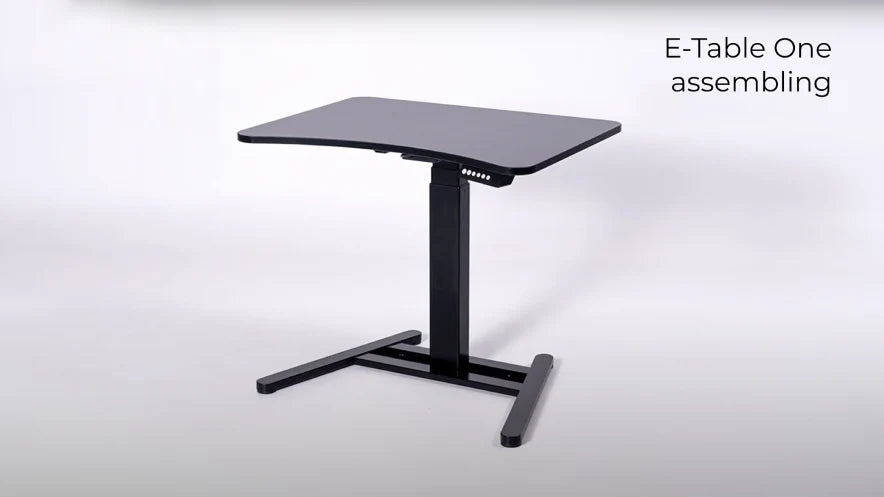
How to assemble an E-Table One
Component Inventory: Verify all parts are included: Hex key, screws, wire clamps, tabletop, support, controller, power supply, AC cable, stand, manual, table leg.
Assembly:
- Secure support to stand with screws.
- Fix support to tabletop with screws.
- Attach table leg to stand with screws.
- Mount controller to tabletop with screws.
- Connect all components.
Ensure all screws are tight for stability before use.
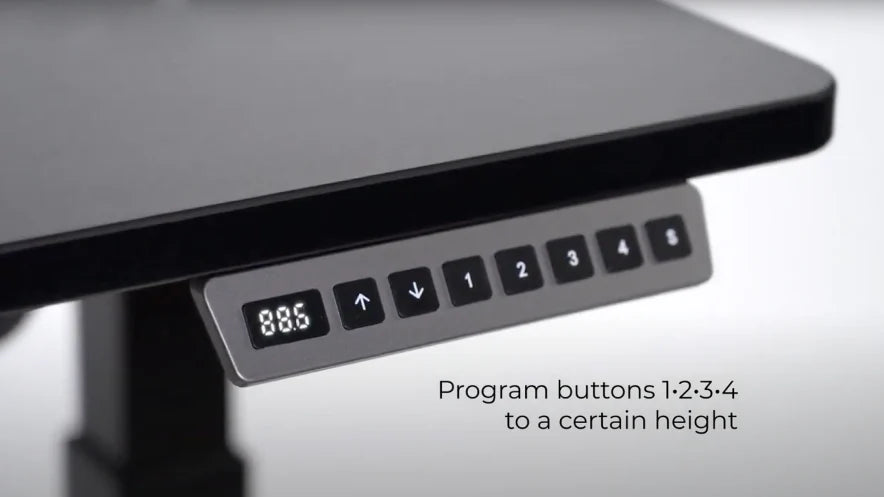
Correct adjustment of the E-Table One
- Adjustable height range: 620 to 1270 mm.
- K1 - K4 buttons: Program to desired heights.
- To save a height setting: Press and hold the chosen button for 5 seconds until you hear a sound; the height is then stored.
-

Find a chair for you
Choose from our range of chairs for work and leisure.
-

Assemble your chair
Select a chair design, choose materials and decoration, then assemble.
-

Consultation
Contact us or visit our nearest store for advice on choosing the chair you like.


